Talk to Sales
Get Started With CTRL ENTER
Go to Page
Personalization
Personalizing Your CTRL ENTER Experience
CTRL ENTER works best when it understands who you are and how you work. Personalization tells the AI your role, your workflow priorities, and any standing instructions — so every response is calibrated to you from the start.
Step 1 — Let's Get Started
When you first sign in to the desktop app, CTRL ENTER will automatically walk you through a quick personalization setup. You can complete it in under a minute or skip it and come back later.
Step 1 — Let's Get Started

You'll be greeted by name and prompted to begin. Click Let's Get Started to proceed.
Step 2 — Tell Us About Yourself

Fill in the following fields:
- Name — how CTRL ENTER will address you
- Role or job title — e.g., RCM Specialist, Billing Manager, Clinical MA. This helps the AI tailor the depth and focus of its responses to your function.
- Custom Instructions (optional) — any standing guidance for how the AI should assist you. For example: "Always be concise" or "Ensure all my claims are accurately complete and clean."
- Other Details (optional) — any additional context about yourself or your workflow
Click Continue when done.
Step 3 — Review & Complete

You'll see a summary of your information. Review it, then click Complete Setup to save. These settings will now be applied to every conversation.
You can always skip any step during onboarding and update your settings later in the Personalization tab.
Updating Your Personalization Settings
To adjust your personalization settings at any time:
- Click the gear icon (⚙️) in the top right corner of the app to open Settings
- Select Personalization from the left sidebar
- To redo the full onboarding wizard, click Run Onboarding in the top right — this will walk you through the setup steps again and let you update any of your information
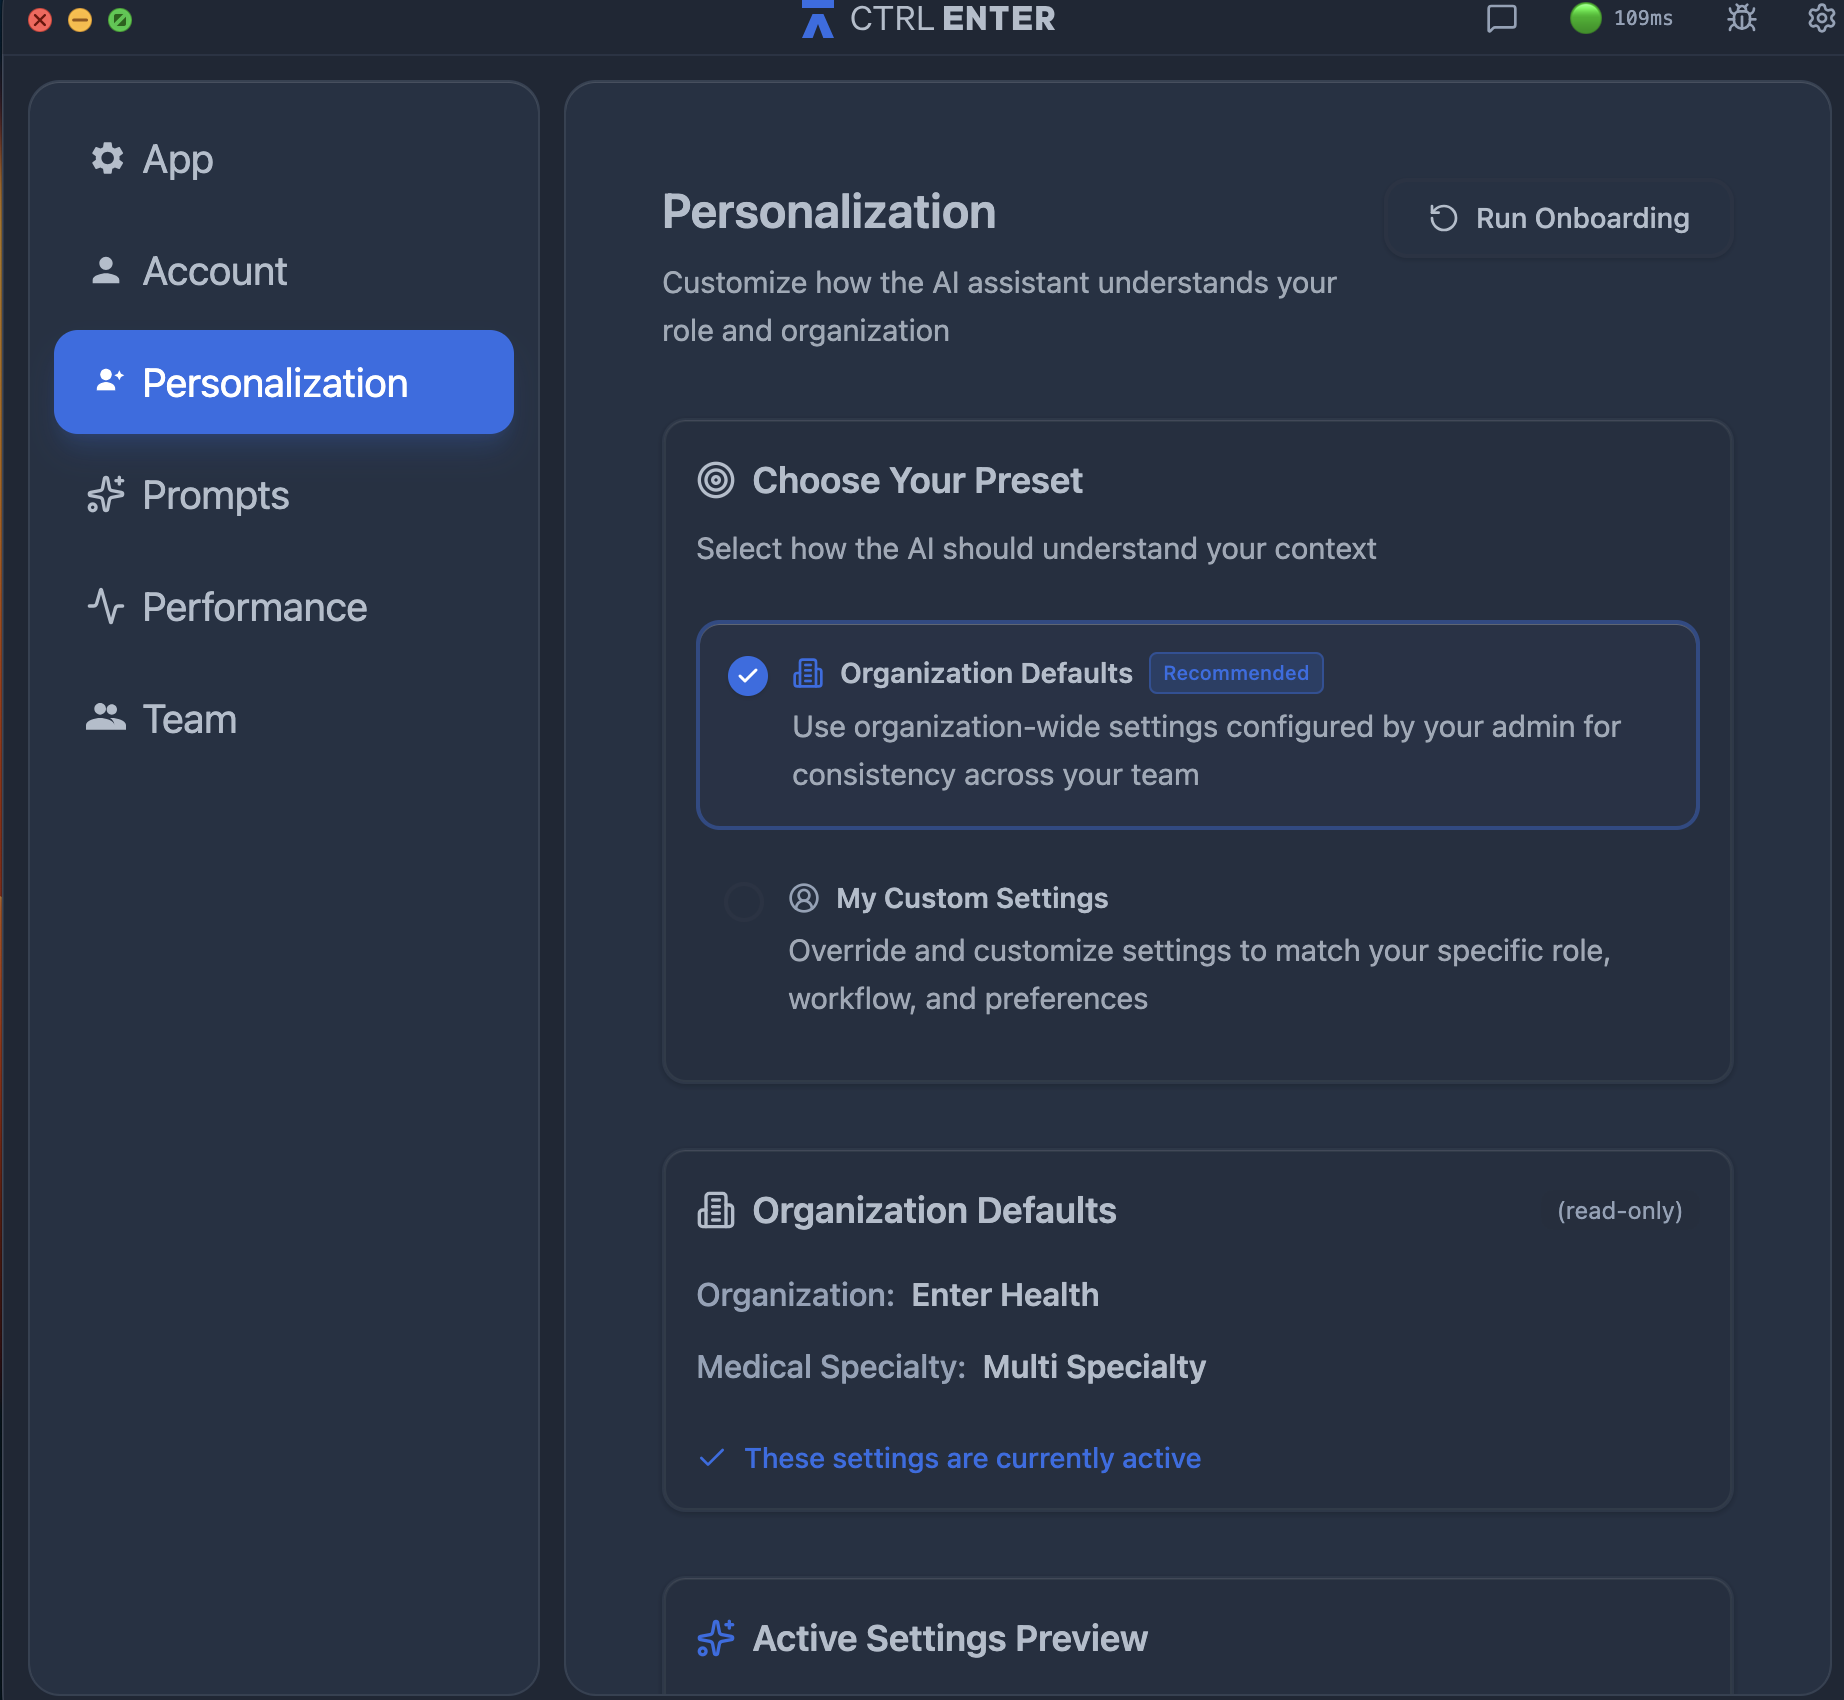
Organization Defaults vs. My Custom Settings
In the Personalization tab, you'll see two preset options:
Organization Defaults (Recommended) Your admin has configured organization-wide settings — including your organization name and medical specialty — that apply consistently across your team. This is the default and recommended setting for most users.
My Custom Settings If your workflow or role differs from the organizational default, you can switch to custom settings and override them with your own preferences. This is useful if you specialize in a specific payer, procedure type, or documentation style that differs from your team's general configuration.
Your currently active settings are shown in the Active Settings Preview section at the bottom of the Personalization tab.
Tips for Strong Custom Instructions
The Custom Instructions field is one of the most powerful personalization options. A few examples by role:
- Billing specialist: "Always flag missing modifiers and check for payer-specific bundling rules."
- Clinical MA: "Prioritize prior authorization requirements and keep responses brief."
- RCM manager: "Focus on denial prevention and provide next-step recommendations with every response."
The more specific your instructions, the more consistently useful CTRL ENTER will be across every conversation.


ENTER is HIPAA compliant and SOC 2 Type 2 certified. See our trust center to learn more.
Ready to Get Started?
Talk to our sales team and see how much ENTER can impact your Revenue Cycle Management today!